|
|
|
|
|
|
|
|
|
|
|
|
|
|
|---|
|
Many have asked how Rick creates this wacky rosette. So, despite the embarrassment this may cause him because of his low tech approach, here is how it is done: |
|
|
|
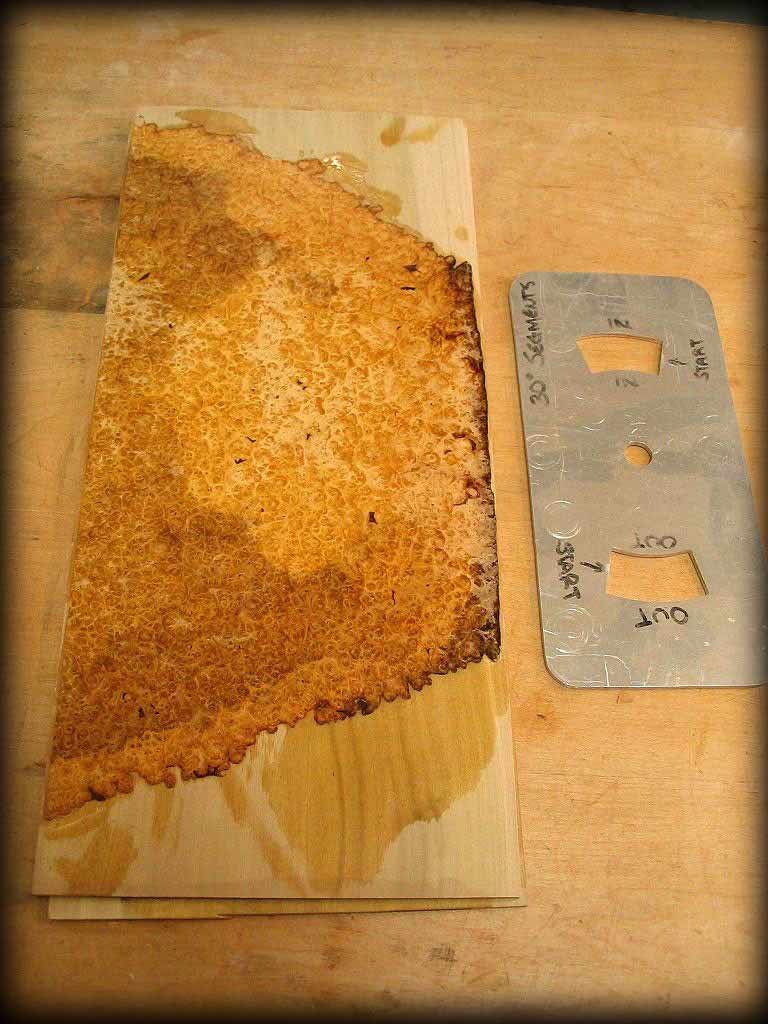
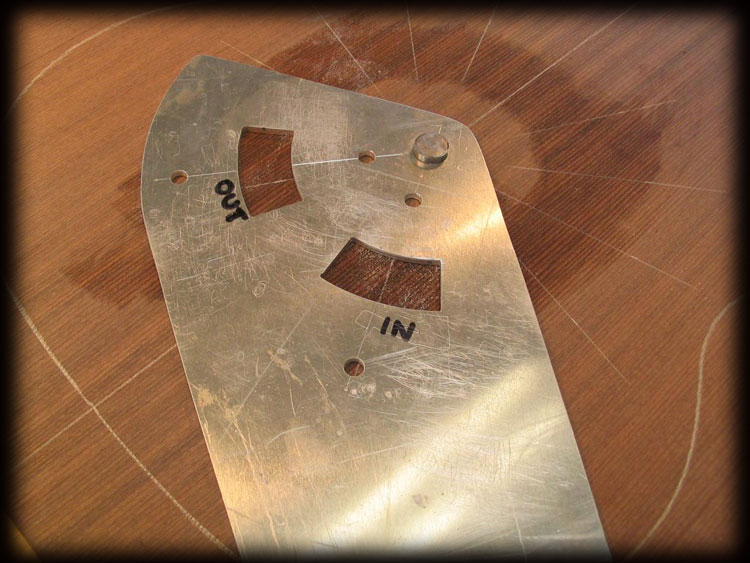
The rosette starts by epoxy gluing amboyna burl to a 1/8" hardwood backer. The honey color works well with darker tops and the natural red/brown color with lighter tops. The fixture for cutting out the segments is shown next to the material with the inner and outer segment sizes. |
|
|
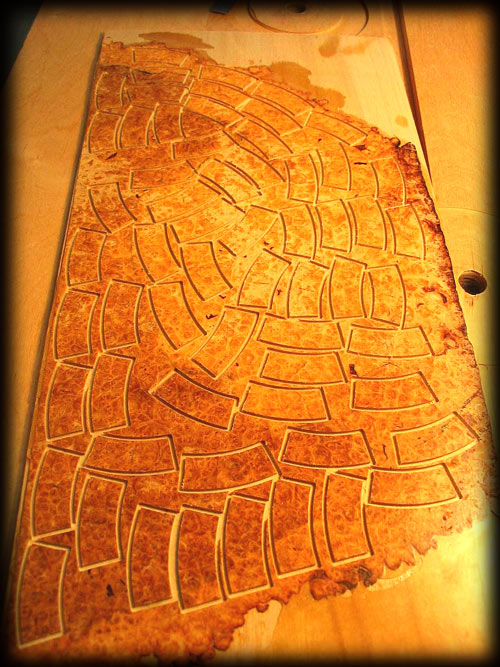
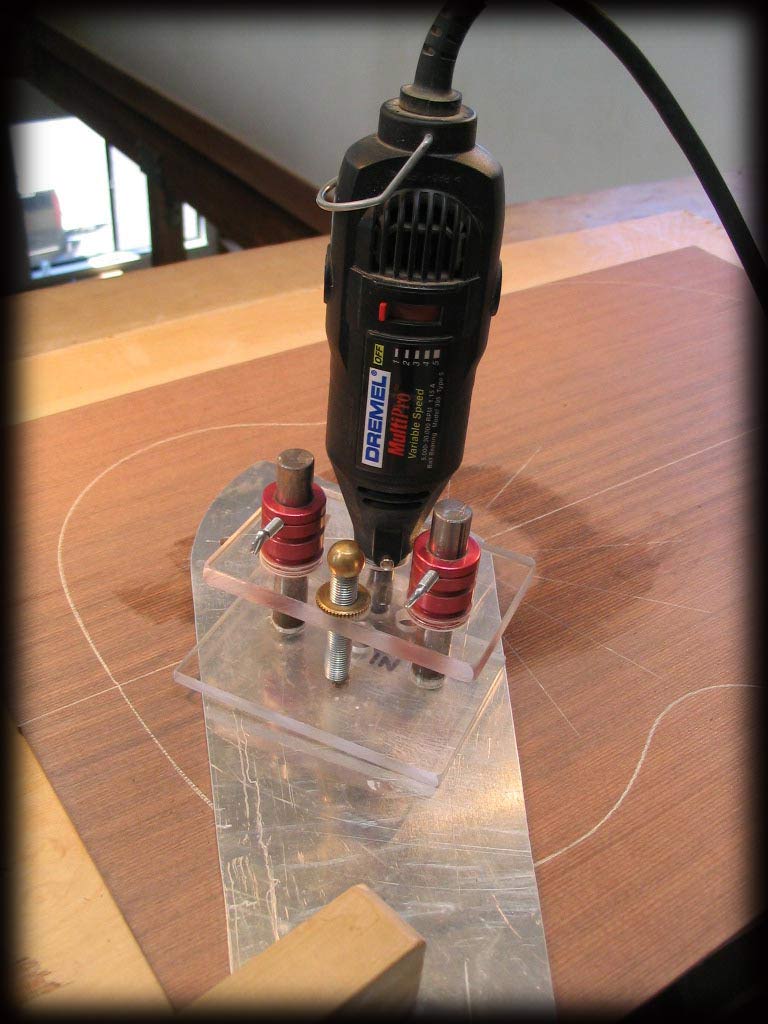
Next the inner and outer segments are cut out using a Dremel tool with a .060" downshear carbide bit and a special router base with a bushing mounted in it. The segment will be the size of the cavity in the top minus .020" all around. |
|
|
We can get quite a few cut on each piece which is a good thing considering the cost of the material and labor to get it this far. |
|
|
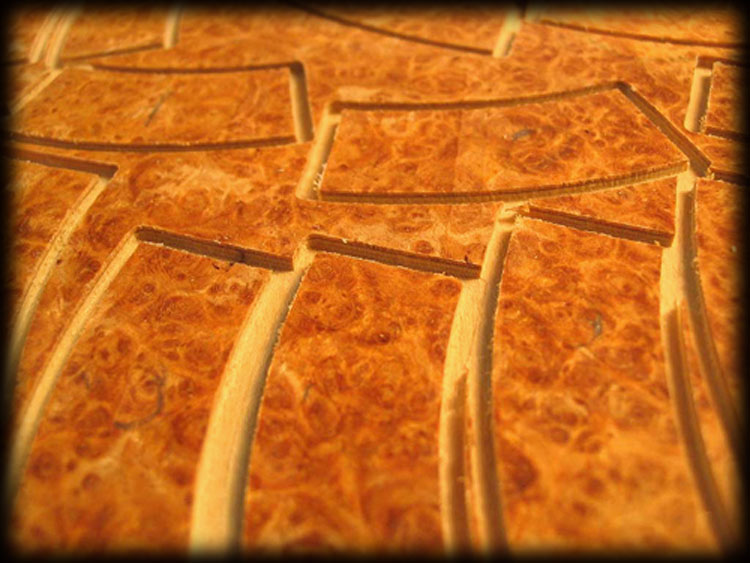
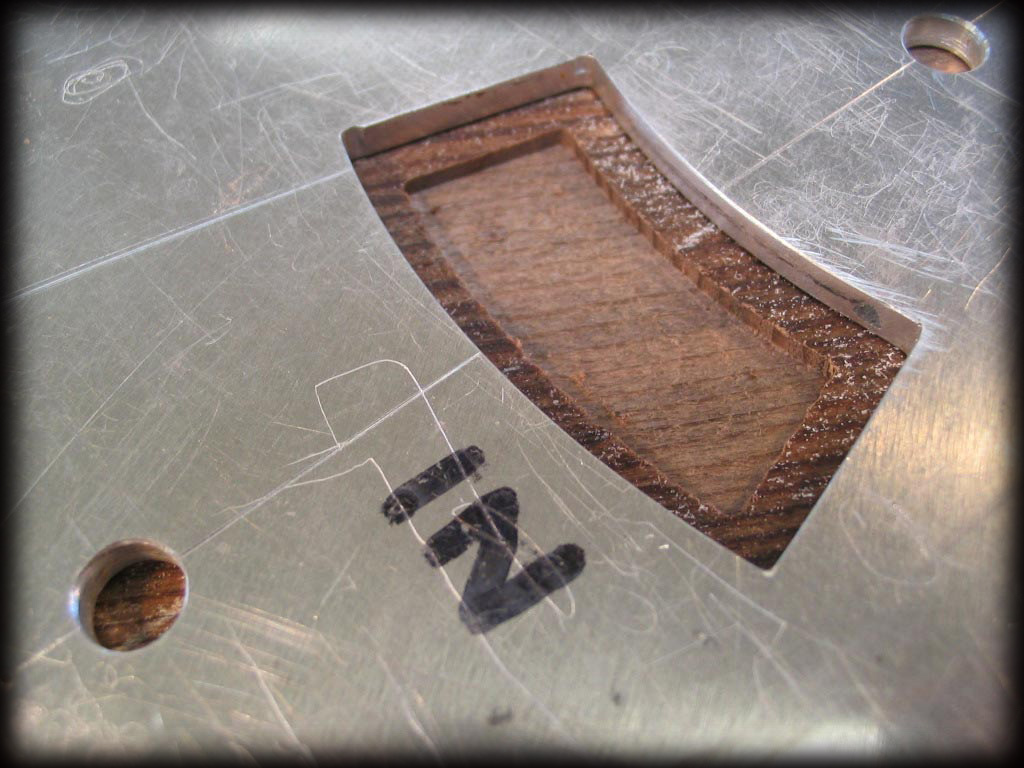
Here's a close-up of the shaped segments, hopefully the same amount of outer and inner pieces. The router bit was set at .060" deep. |
|
|
This is a shot looking at the back side held up to a window for light. You can see that there is just a few thousands of an inch of material left. We then run this through the thickness sander backside up and sand until we reach the bottom of the routed channel and the segments drop out. They are ready to use now. |
|
|
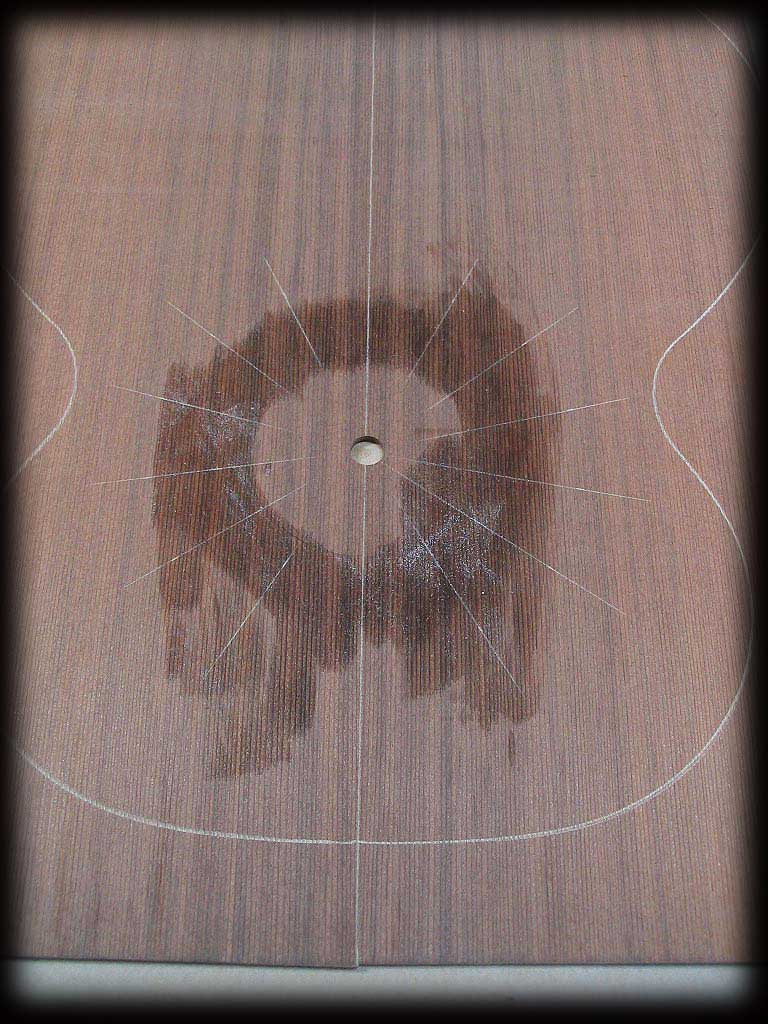
Next, the top is laid out for the segment centerline location. Some superglue is drizzled around to stiffen up the soft wood fibers to avoid chipping during the routing process. This is a sinker redwood top. |
|
|
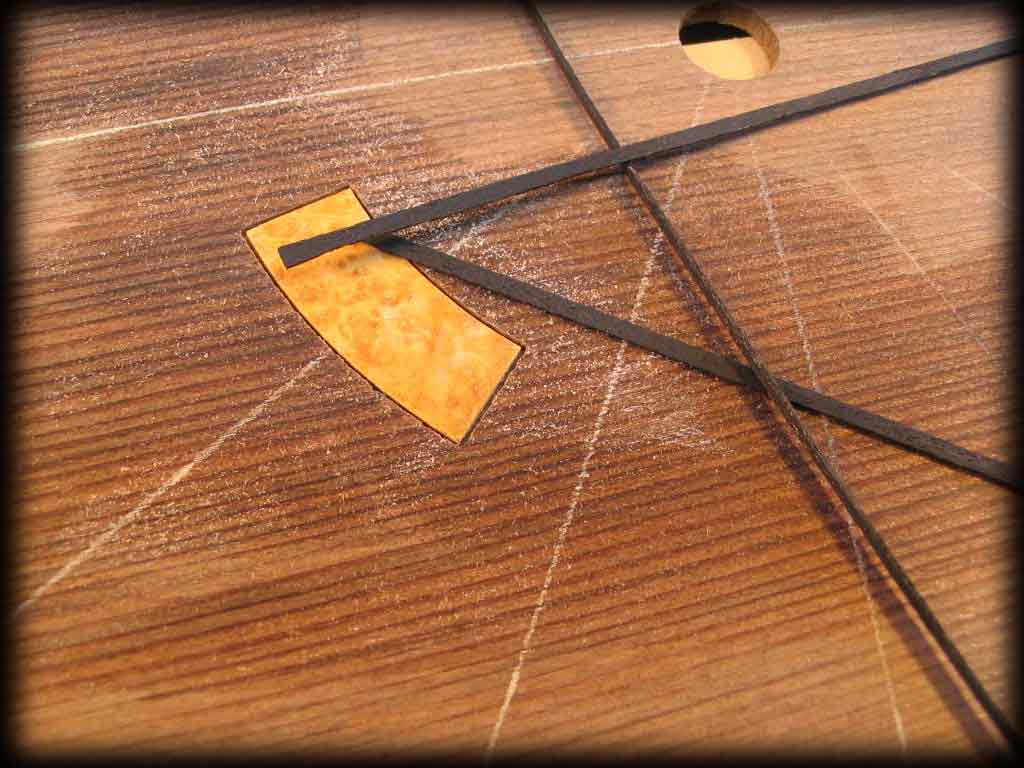
The router fixture is in place now ready to cut out the inner segment cavity. The centerline of the template is lined up with the centerline on the top. |
|
|
The Dremel on the router base with the bushing is ready to go. |
|
|
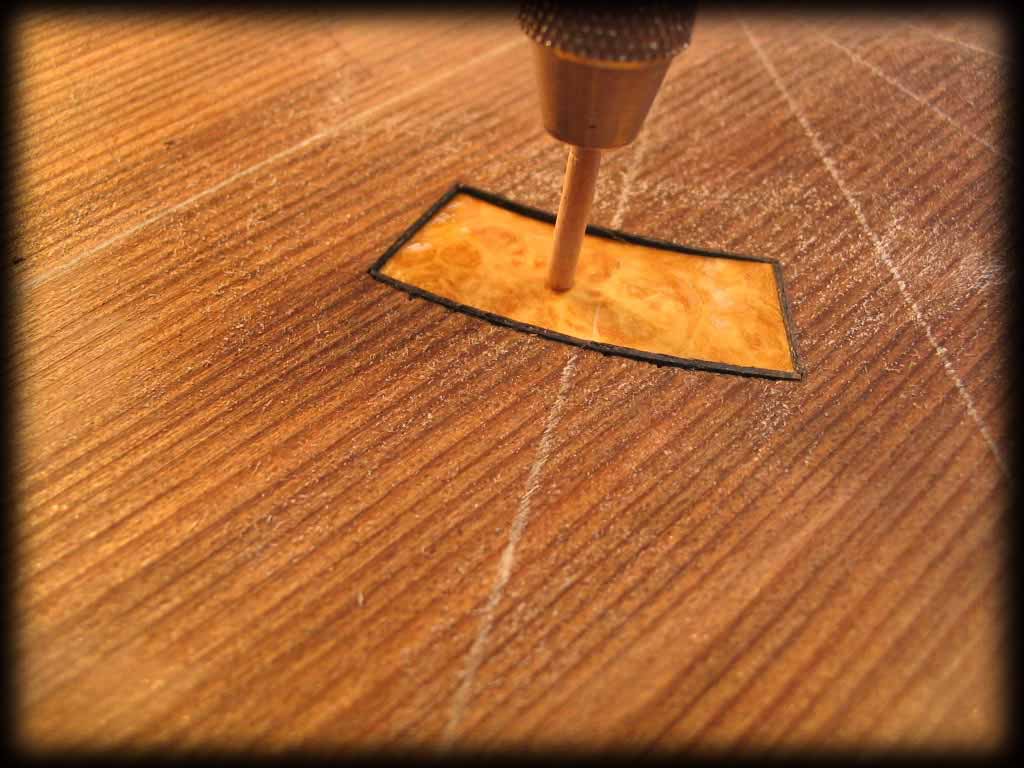
The completed cavity. |
|
|
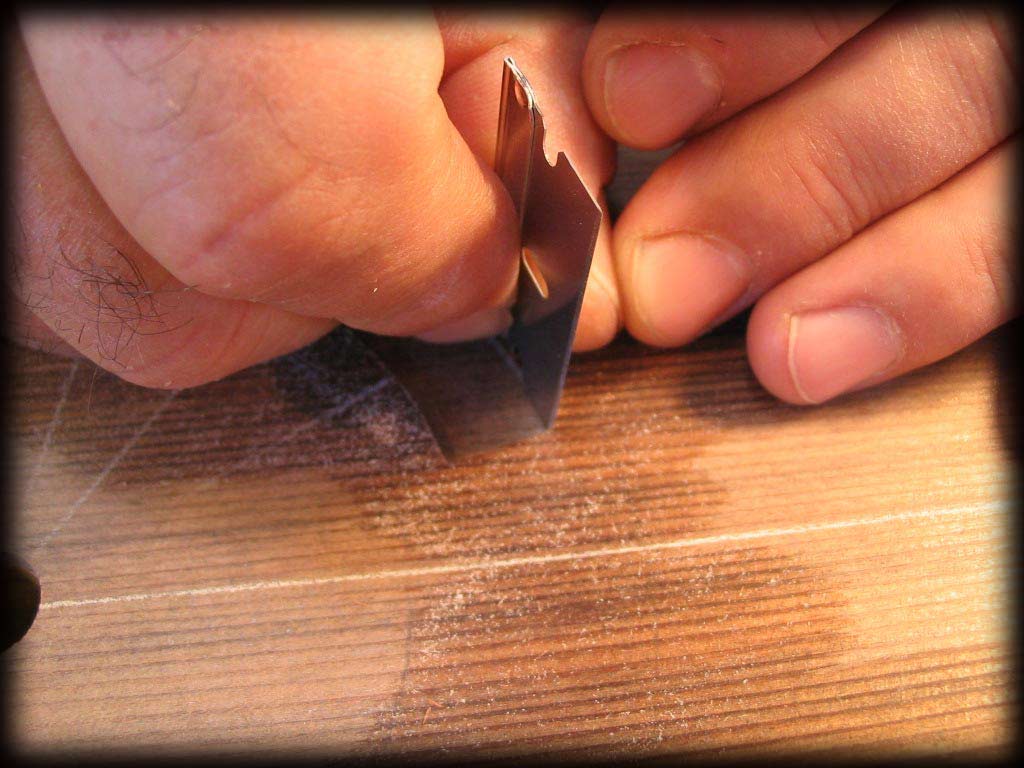
Using a razor blade, Rick squares the corners. |
|
|
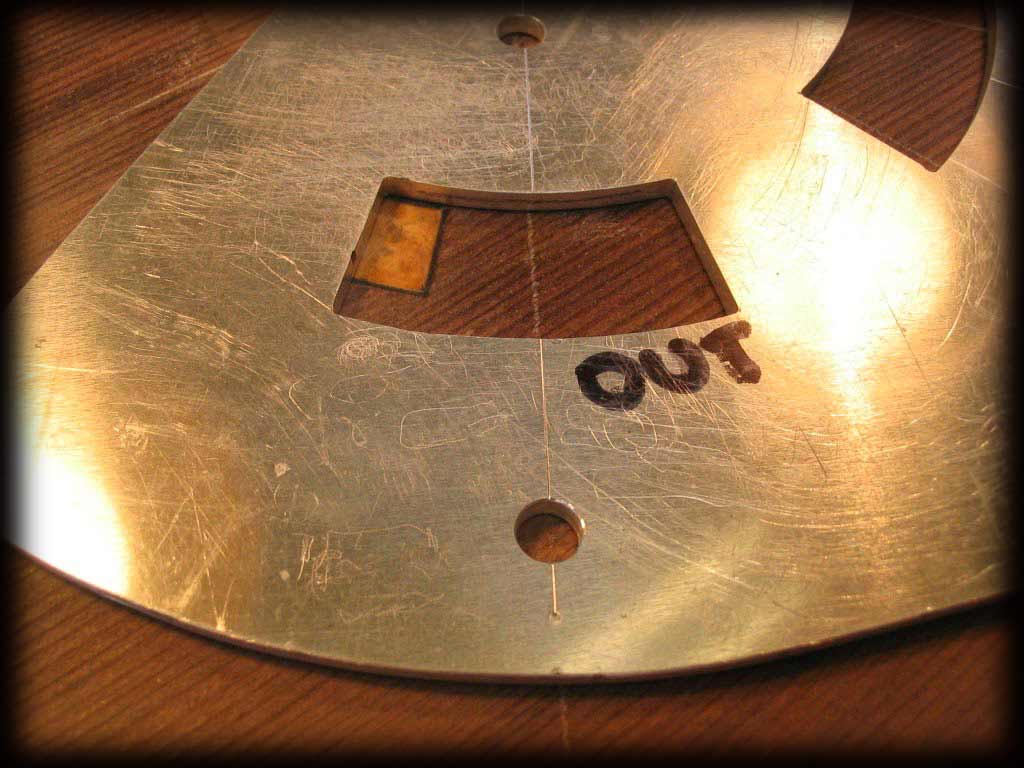
The segment fits the cavity less .020" around the perimeter, the exact thickness of the black purfling strips to be inserted. |
 |
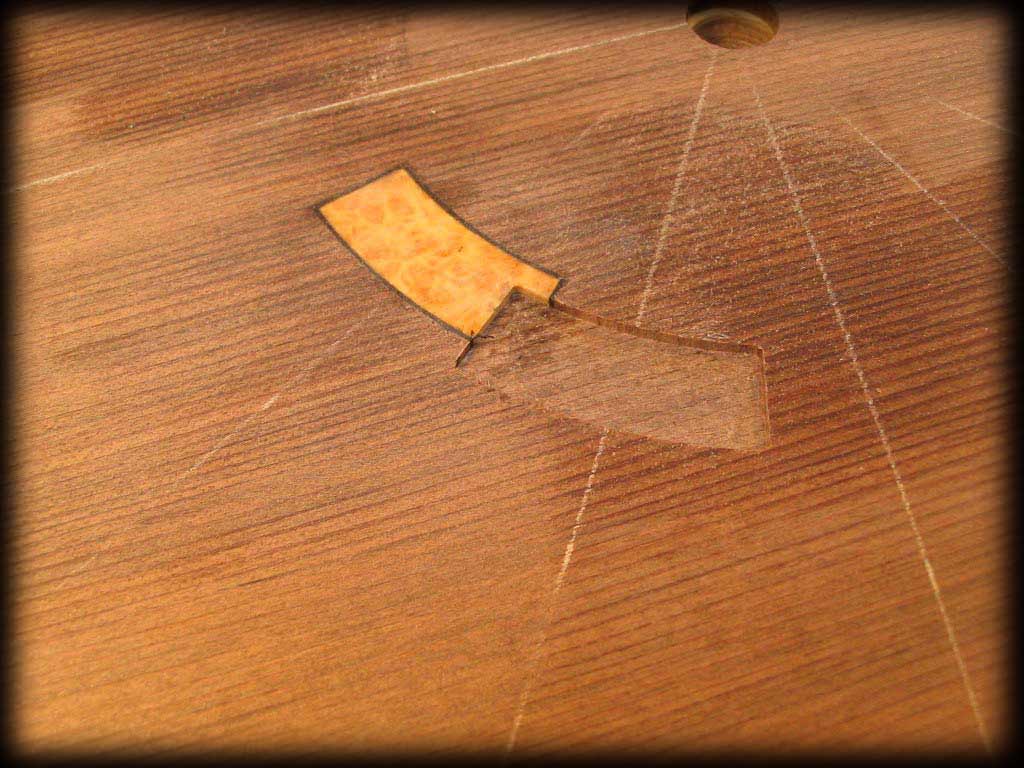
The segment is held down with Rick's very special toothpick and a couple of drops of superglue are applied. |
 |
After some quick leveling with sandpaper, the fixture is inserted again for the next segment which will overlap the first one. |
 |
Now the outer cavity is cut out and the process is well on its way. |
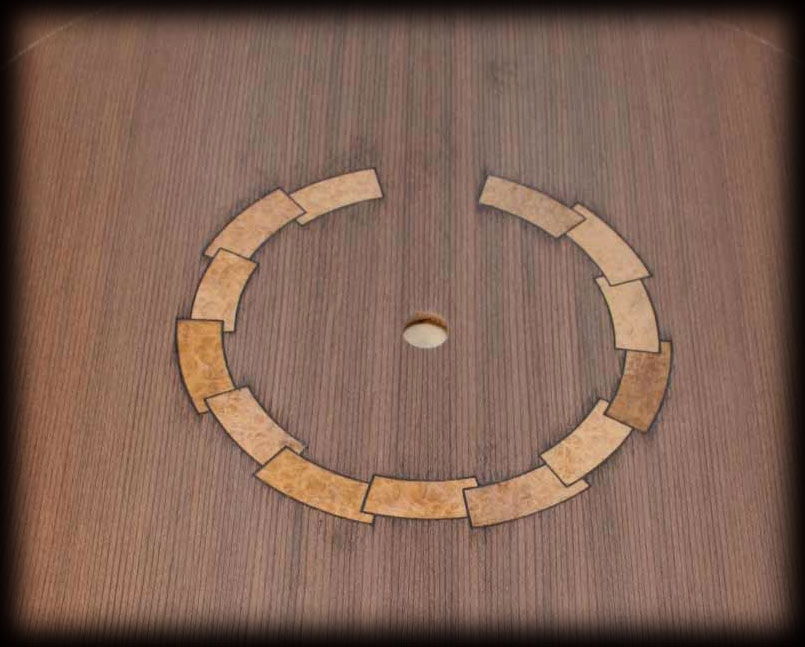 |
The completed rosette...Now what was so difficult about that? |
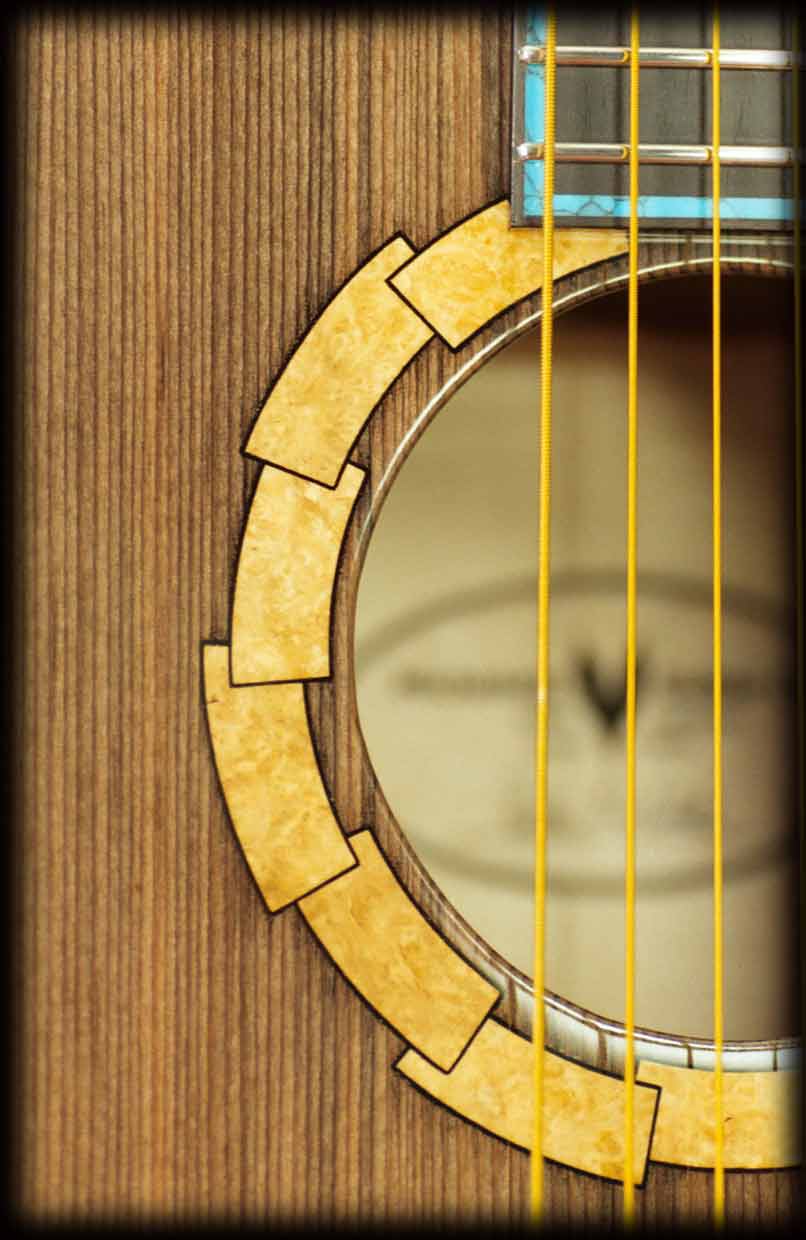 |
Just add a little lacquer and the burl really pops out. |
|
Rick Micheletti |
19590 Shafer Ranch Road |
Willits, California 95490 |
(707) 459-0820 |